Polkadot Frontend DApp Template
React Vite Template with @bagpipes/wallet installed
Create a DApp for the Polkadot ecosystem. This DApp template provides a connection to the main Polkadot wallet extension providers out of the box, so you can get started building swiftly!
You can follow along below, or if you want to get started in seconds then you can just run the replit or fork our Frontend DApp Template on GitHub!
- Replit: Run project in seconds.
Code in a Replit Sandbox
- Fork Github: Get started in minutes.
- Follow along below: Setup project manually in ~12 minutes.

We will setup a Vite React project with @bagpipes/wallet (extension connection) installed!
Welcome to the "Hello World" DApp using @bagpipes/wallet. In this tutorial, we'll build a React application using Vite and integrate the Bagpipes Wallet for seamless wallet functionalities. Users can easily fork this template and start building their applications with wallet functionalities already set up.
Table of Contents
- Prerequisites
- Project Setup
- Installing Dependencies
- Project Structure
- Using
@bagpipes/wallet- Setting Up the Wallet Context Provider
- Creating the Wallet Integration Components
- Running the Project
- Conclusion
Prerequisites
- Node.js (v18)
- npm or Yarn
- Git (optional, for version control and hosting on GitHub)
Project Setup
1. Create a New Vite React Project
We'll use Vite to set up a fast and lightweight React project.
- npm
- Yarn
npm create vite@latest bagpipes-wallet-template -- --template react
yarn create vite bagpipes-wallet-template --template react
Navigate to the project directory:
cd bagpipes-wallet-template
2. Initialize Git (Optional)
If you plan to host this template on GitHub or another Git repository, initialize Git:
git init
Installing Dependencies
1. Install Project Dependencies
First, install the basic dependencies:
- npm
- Yarn
npm install
yarn
2. Install @bagpipes/wallet and Other Necessary Packages
- npm
- Yarn
npm install @bagpipes/wallet antd @polkadot/util-crypto react-router-dom @ant-design/icons
yarn add @bagpipes/wallet antd @polkadot/util-crypto react-router-dom @ant-design/icons
@bagpipes/wallet: The wallet integration library.antd: UI components library used by@bagpipes/wallet.@polkadot/util-crypto: Utility functions for working with addresses.react-router-dom: For routing in the React app.
Project Structure
Your project structure should look like this:
bagpipes-wallet-template/
├── node_modules/
├── public/
├── src/
│ ├── App.css
│ ├── App.jsx
│ ├── assets/
│ │ └── react.svg
│ ├── components/
│ │ ├── AccountInfo.jsx
│ │ ├── ConnectWalletButton.jsx
│ │ ├── Header.jsx
│ │ └── WalletWidgetWrapper.jsx
│ ├── contexts/
│ �│ └── ThemeContext.jsx
│ ├── index.css
│ ├── main.jsx
│ └── styles/
│ ├── AccountInfo.css
│ ├── ConnectWalletButton.scss
│ ├── Header.css
│ └── WalletWidgetWrapper.css
├── package.json
├── vite.config.js
└── README.md
Create Directories and Files
Create the necessary directories and files:
# Navigate to the project root directory

# Create components, contexts, and styles directories
mkdir -p src/components src/contexts src/styles src/assets

# Create component files
touch src/components/AccountInfo.jsx src/components/ConnectWalletButton.jsx src/components/WalletWidgetWrapper.jsx src/components/Header.jsx

# Create context file
touch src/contexts/ThemeContext.jsx

# Create style files
touch src/styles/AccountInfo.css src/styles/ConnectWalletButton.scss src/styles/WalletWidgetWrapper.css src/styles/Header.css

# If you haven't already, create App.css and index.css
touch src/App.css src/index.css

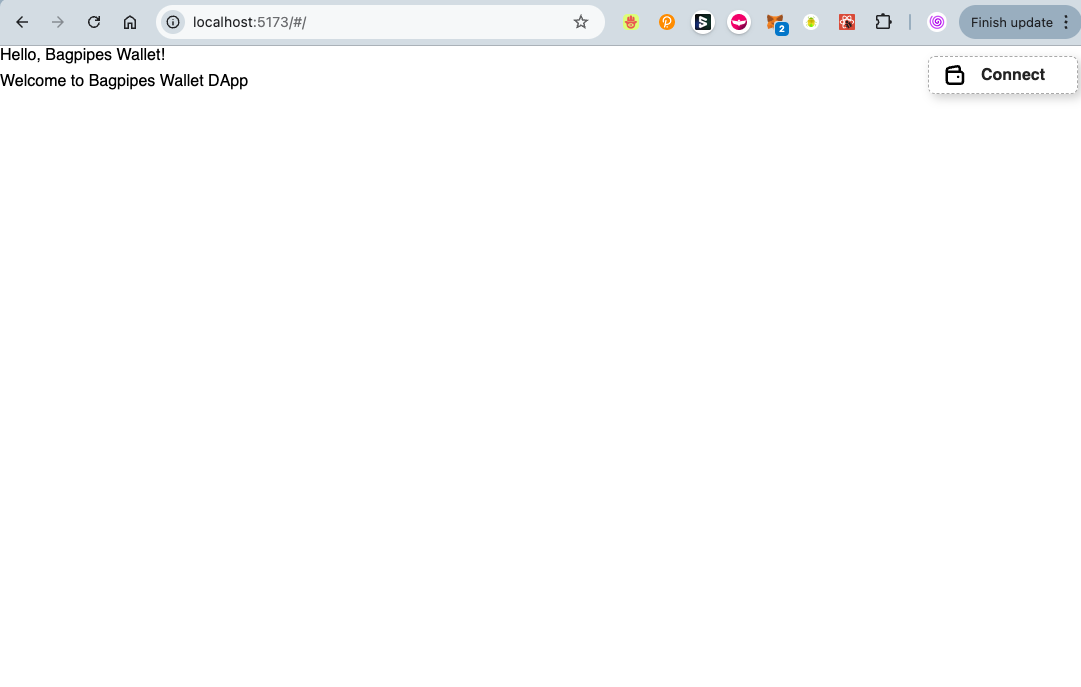
Our DApp template will have a Wallet widget in the top right corner of the screen that your users can connect with their extension.
Using @bagpipes/wallet
Setting Up the Wallet Context Provider
Wrap your application with the WalletContextProvider to supply wallet context values. Update your App.jsx file as follows:
// src/App.jsx
import { useContext } from 'react';
import {
  WalletContextProvider,
  WalletContext,
  SelectWalletModal,
} from '@bagpipes/wallet';
import ConnectWalletButton from './components/ConnectWalletButton';
import AccountInfo from './components/AccountInfo';
import WalletWidgetWrapper from './components/WalletWidgetWrapper';
import Header from './components/Header';
import { Routes, Route, Outlet } from 'react-router-dom';
import './App.css';
import '@bagpipes/wallet/dist/esm/wallet.css';

function Chains() {
  return <h2>Chains Page</h2>;
}

function Home() {
  return <h2>Home Page</h2>;
}

function Lab() {
  return <h2>Lab Page</h2>;
}

function App() {
  const walletContext = useContext(WalletContext);

  return (
    <WalletContextProvider>
      <Header open={!!(walletContext.wallet || walletContext.evmWallet)} />
      <div className="app-header">
        <WalletWidgetWrapper />
      </div>
      <div className="app-content">
        <h1>Hello, Bagpipes Wallet!</h1>
        <ConnectWalletButton />
        {/* <AccountInfo /> */}
      </div>
      <main>
        <Routes>
          <Route
            path="/"
            element={<h1>Welcome to Bagpipes Wallet DApp</h1>}
          />
          <Route path="/chains" element={<Chains />} />
          <Route path="/home" element={<Home />} />
          <Route path="/lab" element={<Lab />} />
          <Route path="/wallet-info" element={<AccountInfo />} />
        </Routes>
        <Outlet />
      </main>
      <SelectWalletModal theme="light" debug={false} />
    </WalletContextProvider>
  );
}

export default App;
- We import
useContextfrom React andWalletContextfrom@bagpipes/walletto access wallet context values. - We wrap our application with
WalletContextProvider. - We include the
Headercomponent, which we'll define later. - We set up routing using
react-router-dom.
Update main.jsx
Update your main.jsx file to include HashRouter for routing and import Ant Design reset styles:
// src/main.jsx
import React from 'react';
import ReactDOM from 'react-dom/client';
import { HashRouter } from 'react-router-dom';
import App from './App';
import 'antd/dist/reset.css';

ReactDOM.createRoot(document.getElementById('root')).render(
  <React.StrictMode>
    <HashRouter>
      <App />
    </HashRouter>
  </React.StrictMode>
);
Creating the Wallet Integration Components
1. Create the ConnectWalletButton Component
// src/components/ConnectWalletButton.jsx
import { useContext } from 'react';
import { OpenSelectWallet } from '@bagpipes/wallet';
import { Button } from 'antd';

function ConnectWalletButton() {
  const selectWallet = useContext(OpenSelectWallet);

  const handleConnectWallet = () => {
    selectWallet.open();
  };

  return (
    <Button className="connect-wallet-button" onClick={handleConnectWallet}>
      Connect Wallet
    </Button>
  );
}

export default ConnectWalletButton;
- We use Ant Design's
Buttoncomponent for styling. - We use
OpenSelectWalletto open the wallet selection modal.
2. Create the AccountInfo Component
// src/components/AccountInfo.jsx
import { useContext } from 'react';
import { useNavigate } from 'react-router-dom';
import { WalletContext } from '@bagpipes/wallet';
import '../styles/AccountInfo.css';

function AccountInfo() {
  const walletContext = useContext(WalletContext);
  const navigate = useNavigate();

  const walletConnected = walletContext.wallet || walletContext.evmWallet;
  const wallet = walletContext.wallet || walletContext.evmWallet;

  const handleDisconnect = () => {
    walletContext.disconnectWallet();
    navigate('/');
  };

  if (!walletConnected) {
    return <div className="account-info">No wallet connected</div>;
  }

  return (
    <div className="account-info">
      <h2>Wallet Information</h2>
      <div className="wallet-summary">
        <div className="wallet-details">
          <div className="wallet-title">
            <strong>Wallet:</strong> {wallet.title}
            <img
              className="wallet-logo"
              src={wallet.logo.src}
              alt={wallet.logo.alt}
            />
          </div>
          <div className="wallet-version">
            <strong>Version:</strong>{' '}
            {walletContext.wallet?.extension?.version ||
              walletContext.evmWallet?.version ||
              'Unknown'}
          </div>
        </div>
      </div>
      <div className="accounts">
        <h3>Connected Accounts</h3>
        {walletContext.accounts.map((account, index) => (
          <div key={index} className="account-card">
            <div className="account-details">
              <strong>{account.name || 'Unnamed Account'}</strong>
              <p>{account.address}</p>
            </div>
          </div>
        ))}
      </div>
      <button className="disconnect-btn" onClick={handleDisconnect}>
        Disconnect
      </button>
    </div>
  );
}

export default AccountInfo;
- Displays connected wallet and account information.
- Allows the user to disconnect the wallet.
3. Create the WalletWidgetWrapper Component
// src/components/WalletWidgetWrapper.jsx
import { WalletWidget } from '@bagpipes/wallet';
import '../styles/WalletWidgetWrapper.css';

function WalletWidgetWrapper() {
  return (
    <div className="wallet-widget-wrapper">
      <WalletWidget />
    </div>
  );
}

export default WalletWidgetWrapper;
- Wraps the
WalletWidgetfrom@bagpipes/wallet.
4. Create the Header Component
// src/components/Header.jsx
import React, { useContext } from 'react';
import { useNavigate } from 'react-router-dom';
import {
  OpenSelectWallet,
  WalletContext,
  WalletIcon,
  WalletWidget,
} from '@bagpipes/wallet';
import '../styles/Header.css';

function Header({ open }) {
  const navigate = useNavigate();
  const walletContext = useContext(WalletContext);
  const selectWallet = useContext(OpenSelectWallet);
  const wallet = walletContext.wallet || walletContext.evmWallet;

  const handleBuilder = () => navigate('/builder');
  const handleChains = () => navigate('/chains');
  const handleLab = () => navigate('/lab');

  if (!open) {
    return null;
  }

  return (
    <header className="header">
      <div className="header-content">
        <img src="/logo.svg" alt="Bagpipes Logo" className="header-logo" />
        <nav className="header-nav">
          <button onClick={handleBuilder} className="header-btn">
            Builder
          </button>
          <button onClick={handleChains} className="header-btn">
            Chains
          </button>
          <button onClick={handleLab} className="header-btn">
            Lab
          </button>
        </nav>
        <button onClick={selectWallet.open} className="header-wallet-btn">
          <WalletIcon /> {wallet ? 'Wallet Connected' : 'Connect Wallet'}
        </button>
      </div>
      <WalletWidget />
    </header>
  );
}

export default Header;
- A header component that includes navigation and wallet connection status.
Adding Styles
Add the provided CSS and SCSS files to src/styles/.
Header.css
/* src/styles/Header.css */

.header {
  display: flex;
  justify-content: space-between;
  align-items: center;
  padding: 1rem 2rem;
  background-color: #f8f9fa;
  border-bottom: 1px solid #ddd;
}

.header-logo {
  height: 40px;
}

.header-nav {
  display: flex;
  gap: 1rem;
}

.header-btn {
  background: none;
  border: none;
  color: #0070f3;
  font-size: 1rem;
  cursor: pointer;
}

.header-btn:hover {
  text-decoration: underline;
}

.header-wallet-btn {
  display: flex;
  align-items: center;
  background: #0070f3;
  color: white;
  border: none;
  border-radius: 4px;
  padding: 0.5rem 1rem;
  cursor: pointer;
}

.header-wallet-btn svg {
  margin-right: 0.5rem;
}

.header-wallet-btn:hover {
  background: #005bb5;
}
AccountInfo.css
/* src/styles/AccountInfo.css */

.account-info {
  padding: 1rem;
  background: #f8f9fa;
  border-radius: 8px;
  max-width: 1000px;
  margin: 1rem auto;
  box-shadow: 0 2px 4px rgba(0, 0, 0, 0.1);
}

.account-info h2,
.account-info h3 {
  margin-bottom: 1rem;
  color: #333;
}

.wallet-type {
  margin-bottom: 1rem;
}

.accounts {
  margin-bottom: 1rem;
}

.account-card {
  padding: 0.75rem;
  border: 1px solid #ddd;
  border-radius: 4px;
  margin-bottom: 0.5rem;
  cursor: pointer;
  background: #fff;
  transition: background 0.3s ease, border-color 0.3s ease;
}

.account-card:hover {
  background: #f0f0f0;
  border-color: #0070f3;
}

.account-card.selected {
  background: #e6f7ff;
  border-color: #0070f3;
}

.account-details {
  display: flex;
  justify-content: space-between;
  align-items: center;
}

.account-name {
  font-weight: bold;
  color: #333;
}

.account-address {
  font-size: 0.9rem;
  color: #555;
  display: flex;
  align-items: center;
}

.copy-btn {
  margin-left: 0.5rem;
  padding: 0.25rem 0.5rem;
  font-size: 0.8rem;
  background: #0070f3;
  color: #fff;
  border: none;
  border-radius: 4px;
  cursor: pointer;
}

.copy-btn:hover {
  background: #005bb5;
}

.selected-account-details {
  margin-top: 1rem;
  padding: 1rem;
  background: #fff;
  border: 1px solid #ddd;
  border-radius: 4px;
}

.wallet-title {
  display: flex;
  align-items: center;
}

.wallet-logo {
  margin-left: 5px;
}
Update Other Styles as Necessary
Similarly, add or update styles for ConnectWalletButton.scss, WalletWidgetWrapper.css, etc.
Running the Project
1. Start the Development Server
- npm
- Yarn
npm run dev
yarn dev
This will start the Vite development server, and you can view your app at http://localhost:5173 (default port).
2. Test the Wallet Integration
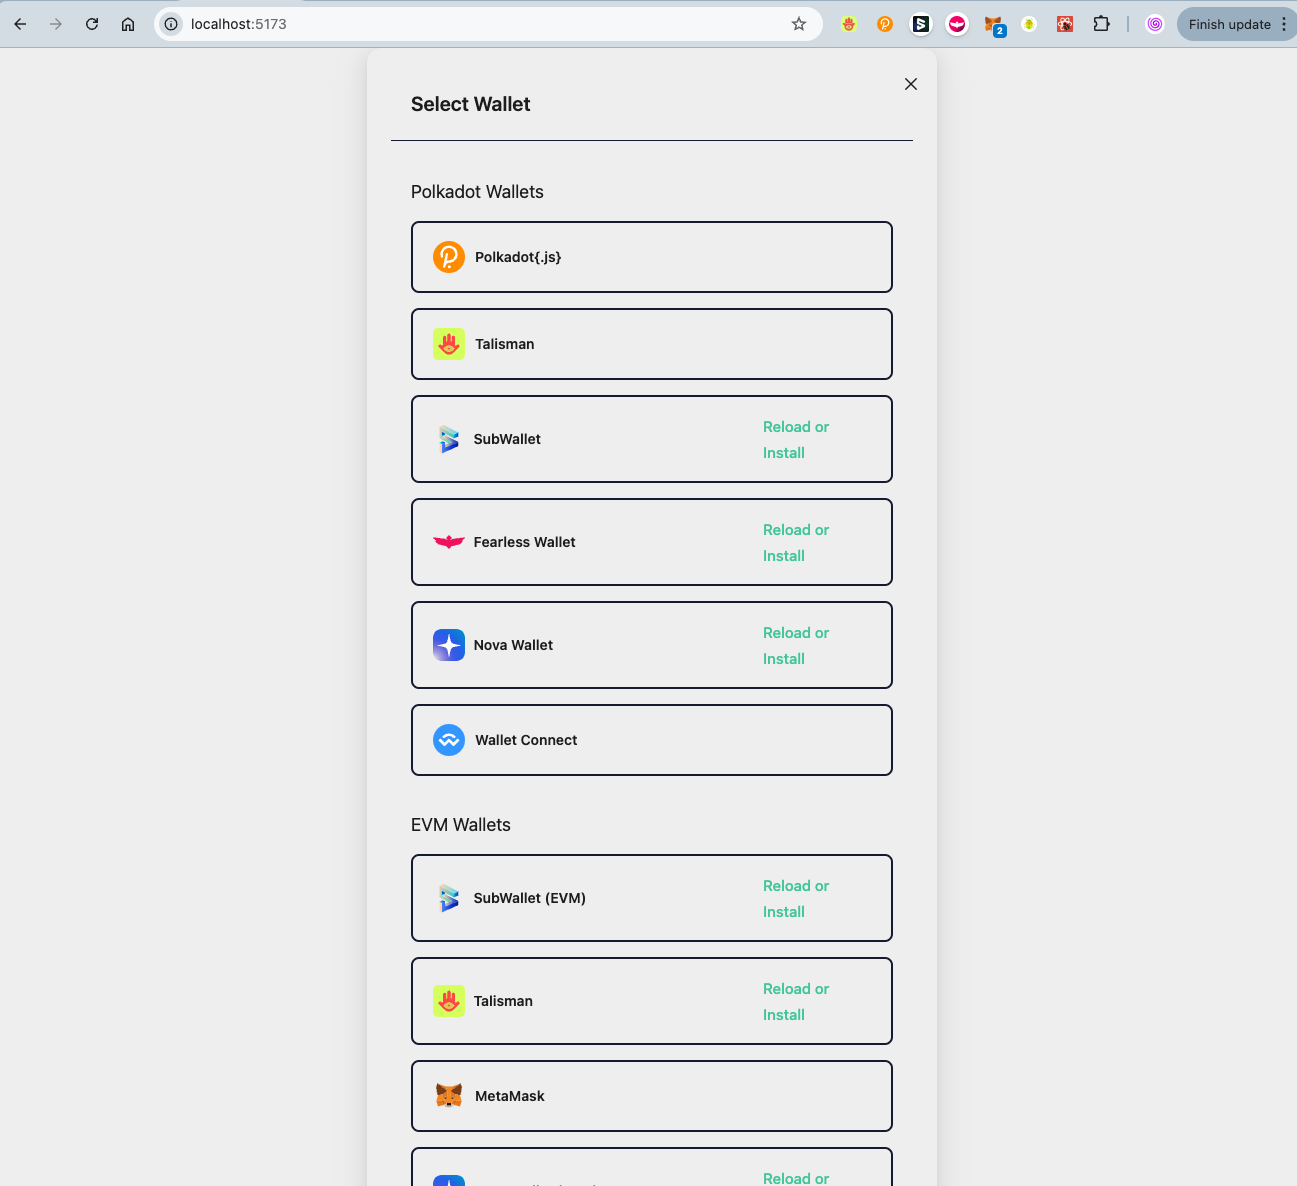
- Click on the "Connect Wallet" button.
- The
SelectWalletModalshould appear. - Select a wallet to connect.
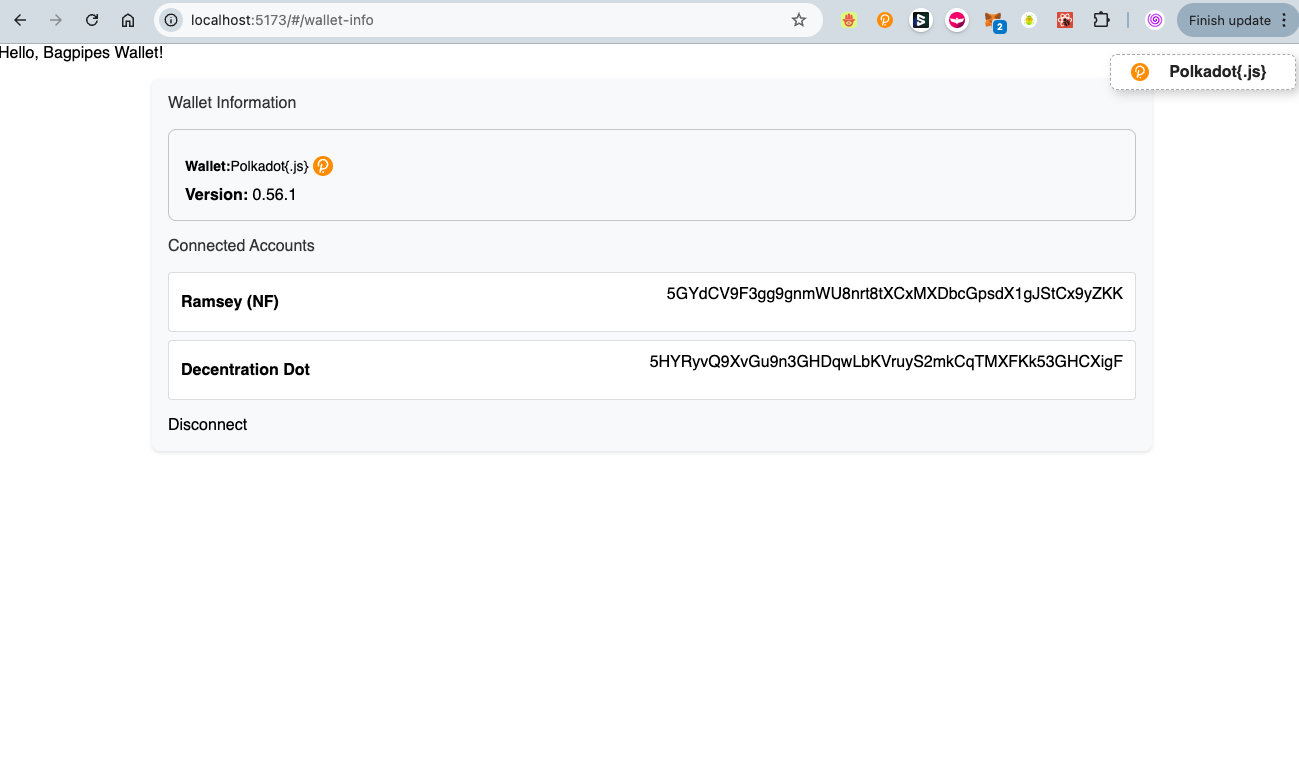
- After connecting, the
AccountInfocomponent should display the connected wallet type and account address. - The
WalletWidgetshould display wallet information in the header.

Here we have a connected wallet extension with selected accounts shown.
Conclusion
You have now successfully set up a basic DApp using @bagpipes/wallet. This template can be forked and extended for your own projects, with wallet functionalities already integrated.